There are many different ways to beat Lucy, but this is the way I found easiest. It requires less skill, so level doesn’t matter. It also goes by quickly, so there is less room for error.
Optional: Upgrade your throwing knives and/or pistols
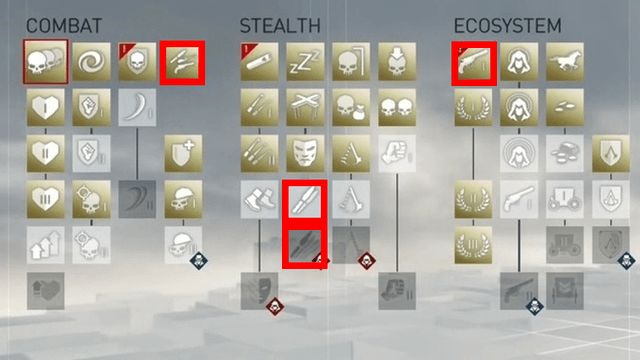
You don’t have to upgrade your gear, but it will make your life somewhat easier. This includes damage increasing the number of ammo and throwing knives you can carry (highlighted in the bright red in the above picture).
You can fight Lucy with the basic stats with the method detailed below, but it will most likely take you longer and require more tries.
1. Stock up on supplies
You’re going to need a lot of equipment to beat Lucy Thorne using this method. This includes smoke bombs, bullets, and throwing knives.
You can either buy these from the shop, or kill a whole bunch of guards and loot their bodies for the items. It doesn’t matter too much as long as you’re completely stocked up.
2. Make your way over to Lucy
Upon starting the memory (memory 7 of sequence 5 if you are using chapter select), you’ll have to sneak past some guards, solve a simple puzzle, and then climb up the cathedral to get to Lucy.
The Guards
To sneak past the guards, use the haystack in the upper left hand corner. Monitor the guards, or use Eagle Vision to track them, and then perform a leap of faith from the building next to the haystack. The positioning of the haystack and the building in which you should jump from is pictured above.
You must remain anonymous to interact with the base of the monument, so don’t rush ahead just yet!
Upon watching the guards, you’ll find an opening. Sneak out then and make your way below the awning and interact with it.
If you’re anything like me this part may take a couple of tries, but, if you fail and get spotted, you can open up the menu and restart the checkpoint to start off just about where you left off before being spotted.
The Puzzle
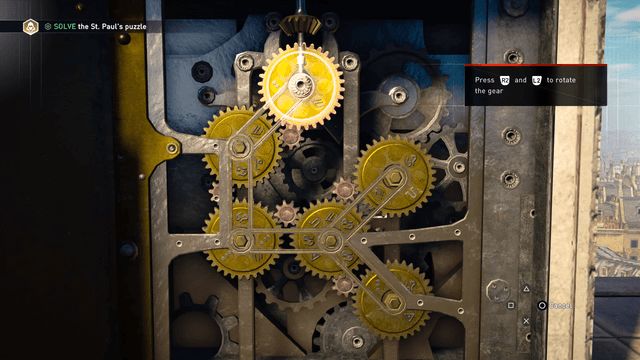
Keep turning the cogs until the symbols match up. If you’re having trouble finding a symbol you need, make sure it’s not hidden under one of the thick metal pieces that jut out from the sides.
Also, make sure to work from one direction to the other. For example, start from the top and work your way down or start from the bottom and work your way up. That will require less backtracking on your part.
It may take you a couple of tries, but if you pay attention, it won’t be that bad.
3. Taking down Lucy
So you’ve made it through the rest of the memory and now you’ve come to the point where you have to counter all of her attacks. Upon first glance, this may seem extremely difficult because your timing has to be perfect, but it’s really not that bad.
Remember those items you stocked up on? Now is the time to use them.
First smoke bomb
Upon starting the fight, grab one of your smoke bombs and unleash it on her.
Quickly switch to your throwing knives or pistols and bombard her with ammo.
Rinse and repeat
If your items aren’t upgraded high enough, one round won’t kill her and the last cutscene won’t start. If this is the case, you’re going to want to repeat what you did with the first smoke bomb.
Select another, drop it on her, and unload more of your items. If you need to switch items (throwing knives to pistols or pistols to throwing knives), feel free to do so. That’s why you stocked up on them earlier!
If for whatever reason she’s not dead after two smoke bomb attacks, use a third one and continue attacking.
If you run out of throwing knives and pistol ammo, feel free to melee attack her.
The Middle Scene?
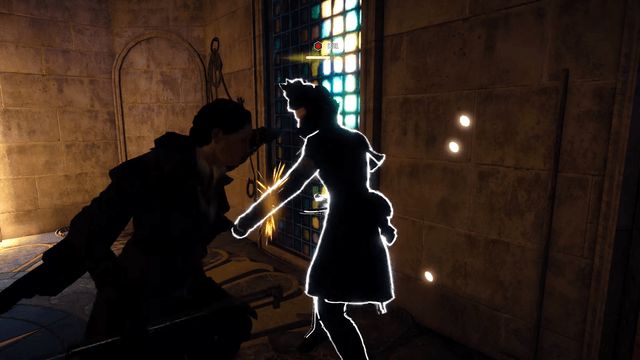
Upon reducing Lucy’s health to about half, she’ll grab you and engage in a special scene where all you can do is counterattack.
If you followed the above steps correctly, Lucy will have so little health that you will skip the middle scene altogether. This is critical because the middle scene is really annoying and requires perfect timing.
If for whatever reason you do get stuck in the middle scene, you’re better off just restarting the checkpoint and trying again with the steps outlined above. You can try to counterattack her and keep up with the optional objective. However, since it requires perfect timing, chances are you won’t make it on your first try and will have to restart the checkpoint anyway.
3. The Final Scene
After destroying Lucy with your gear and, hilariously, never giving her a chance to attack you back, Evie will tackle her through the window in a cutscene and the fight will end.
Congrats! You’ve gotten your optional objective!
Final Notes
It is possible to fight Lucy legitimately and counter her attacks manually with proper timing and by hitting the right button. However, at lower levels, this method will take a long time. Evie has an extremely low attack and this will make it even more difficult to succeed because you will have to counter continuously. Unless you are extremely skilled or are at a really high level, it is not recommended to fight her in such a way.
Did my method help you take down Lucy Thorne while countering all of her attacks? Did you use a different method that worked better for you? Be sure to let us know in the comments below!
