Before you get to cleaning though, there’s a few things you should check. For one, does your oven have a self-cleaning mode? Many of the best ovens (opens in new tab) increasingly offer this smart feature which runs a high-heat cycle, effectively incinerates anything that’s clinging to the inside of your oven ready to be wiped off when cool. We’ve all seen those oven cleaning solutions or sale at the grocery store, with heady chemicals that require plenty of ventilation and an oven-free day to let it deep clean your oven. While it’s tempting to blast the inside of your electric range (opens in new tab) or gas range (opens in new tab) with one of these kits every now and again, you’ve probably got everything you need for a chemical-free clean oven at home. This saves you a trip to the store, and the cost of oven cleaning kits. Besides, it doesn’t always feel like a good idea to put chemicals inside your cooker.
How to clean an oven
Step 1: Take out the racks
The racks that sit inside your oven will only get in the way as you clean it, so we suggest taking them out. If possible, you can leave them to soak in some hot soapy water while cleaning the interior of your oven. Then, turn your attention to the racks themselves. Using a wire scrubber or a used toothbrush, give both sides of the rack a good scrubbing to remove any burnt-on spills and grimy buildup.
2. Make a DIY cleaner
If you’ve read up on how to clean a refrigerator (opens in new tab) or even how to clean a pillow (opens in new tab), you’ll know that one of the best natural cleaning methods is to use baking soda and vinegar. Baking soda foams up when exposed to vinegar, which can lift out tough greasy stains. It’s also a great exfoliant because of its small granules, meaning it’s perfect for scrubbing out baked-on grime. To make a DIY oven cleaner, combine baking soda and water to make a thick paste. Start with a generous amount of baking soda and slowly add warm water until you’re happy with the thick consistency.
3. Apply your cleaner
Slather your baking soda and water mixture over the inside of your oven in a thick and generous coating, making sure you wear gloves if you apply by hand - if you have a paintbrush available, that’s an even better method of applying it. Make sure you reach into all the corners and between the rack shelves of your oven as you do this, but avoid the door as this is a more sensitive area. We’ll tell you how to clean that shortly. You’ll need to leave the mixture to do all the hard work for a few hours, at least. Leave the door of the oven open as you do this, as it will allow the mixture to dry out a little.
4. Get scraping
Once you’ve left your baking soda for a good while, it’s time to remove it. You can do this with the flat side of a plastic spatula, or even an old card. The idea is to scrape off the baking soda solution leaving behind a clean oven, but if it gets a little too baked-on, spray a bit of water (or better yet, vinegar) to loosen up the solution. Clear out the debris that’s left, and inspect your oven for any missed spots. We’ll get to those next.
5. The finishing touches
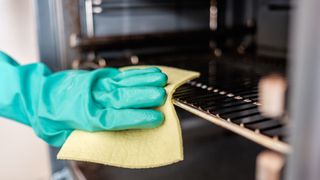
Top up a spray bottle with some vinegar for this step. Having a bottle of vinegar will always come in useful, whether it’s for cleaning your barbecue grill or your microwave. Give the inside of your oven (including the door, this time) a generous spritz, and using a firm plastic brush, scrub away any remaining grime that’s still stuck to the inside of your oven. Using a soft microfiber cloth to prevent any scratches, buff away the vinegar on glass door of your oven. If anything proves difficult to shift, sprinkle some baking soda and top it with a spray of the vinegar once more. Leave that to bubble away and give your oven time to breathe before wiping everything down with a soft, dry cloth.